Set up your business email on iPhone and iPad
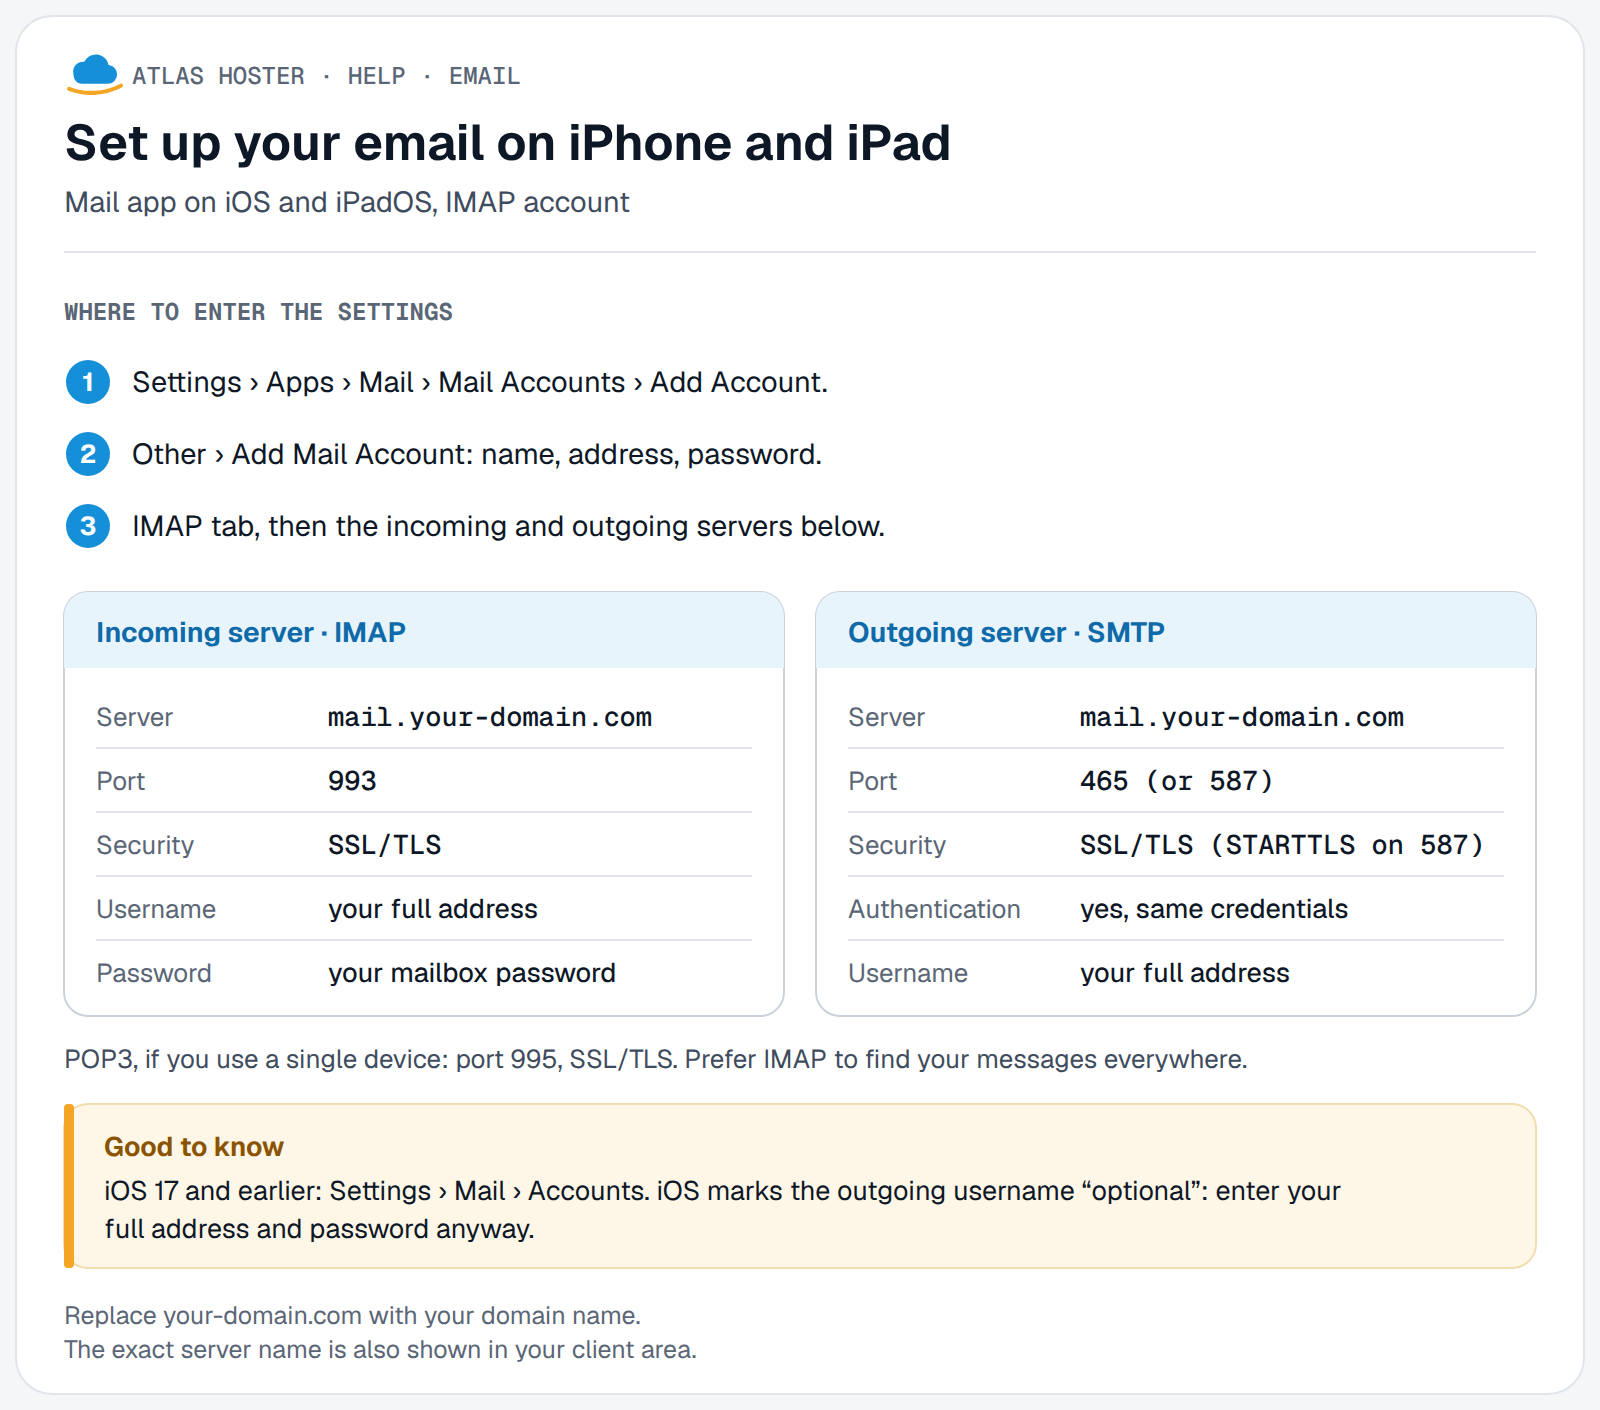
To receive and send your business email on an iPhone or iPad, add your address as an IMAP account in the Mail app. You need your full address, the mailbox password and the servers of your mail service.
Before you start
- Have your full email address and the mailbox password at hand (see Create a business email address in cPanel). Test them first in webmail.
- Keep the settings from IMAP, POP and SMTP settings in view: server
mail.your-domain.com, ports 993 (incoming) and 465 (outgoing). The exact values for your mailbox are shown in cPanel, under Email Accounts › Connect Devices. - Connect the device to the Internet.
Steps
- Open Settings, then tap Apps.
- Tap Mail, then Mail Accounts.
- Tap Add Account.
- Enter your full email address, then tap Next.
- Tap Add Other Account, then Mail Account.
- Enter your name, your email address, the mailbox password and a description (for example "Work"). Tap Next.
- Mail tries to find the settings. If it does, tap Done. If not, tap Next and continue with the next step.
- Choose IMAP for your new account.
- Fill in the incoming mail server:
mail.your-domain.com, with your full address as the username and the mailbox password. - Fill in the outgoing mail server:
mail.your-domain.com, with the same username and password. Tap Next. - If the settings are correct, tap Save. If not, iOS asks you to edit them: check the server, the address and the password.
On an older version of iOS, the path is Settings › Mail › Accounts › Add Account › Other › Add Mail Account.
These labels come from Apple Support; the screen on your device may vary slightly with the iOS version.
Alternative: cPanel provides an automatic configuration script for iPhone and iPad (Email Accounts › Connect Devices, Mail Client Automatic Configuration Scripts section). Choose the secure protocol (IMAP with SSL/TLS).
Expected result
The account appears in Mail with its inbox. Your messages load, and a message sent from this address goes out without error.
If something goes wrong
- A certificate or server identity warning: check the server name you entered; it must be the one shown in cPanel, under Connect Devices. Do not accept a certificate whose name does not match.
- Password refused: the username is the full email address. Test the same password in webmail.
- You can receive but not send: check that the outgoing server has the same username and password, then try port 587 with STARTTLS (see IMAP, POP and SMTP settings).
- The settings are refused when saving: Apple then advises checking the information with your email provider. Contact our support, mentioning your iOS version.
Frequently asked questions
IMAP or POP on iPhone?
IMAP. Messages stay on the server: you see the same ones on the iPhone, the computer and in webmail. With POP, messages are downloaded and then removed from the server.
Does the same guide apply to iPad?
Yes. Apple's support page covers iPhone and iPad together, with the same steps.
Which username should I enter?
The full email address, for example you@your-domain.com, for the incoming server and for the outgoing server.
Can I add several addresses on the same iPhone?
Yes. Repeat steps 3 to 11 for each address.
Mail did not find my settings by itself: is that normal?
Yes, Apple expects it: if Mail cannot find the settings, it asks you to enter them by hand, as in steps 8 to 10.
Related articles
- IMAP, POP and SMTP settings for your mailbox
- Set up your mailbox on Android
- Set up your email address in Outlook
- Log in to webmail (Roundcube)
Your business email, with you everywhere? Discover our business email plans.